All blogs
Mobile App Development
How to Publish App Updates on Google Play
A step-by-step checklist to prepare, submit, and stage Google Play app updates—versioning, signing, compliance, and rollout best practices.
9 min read

How to Publish App Updates on Google Play
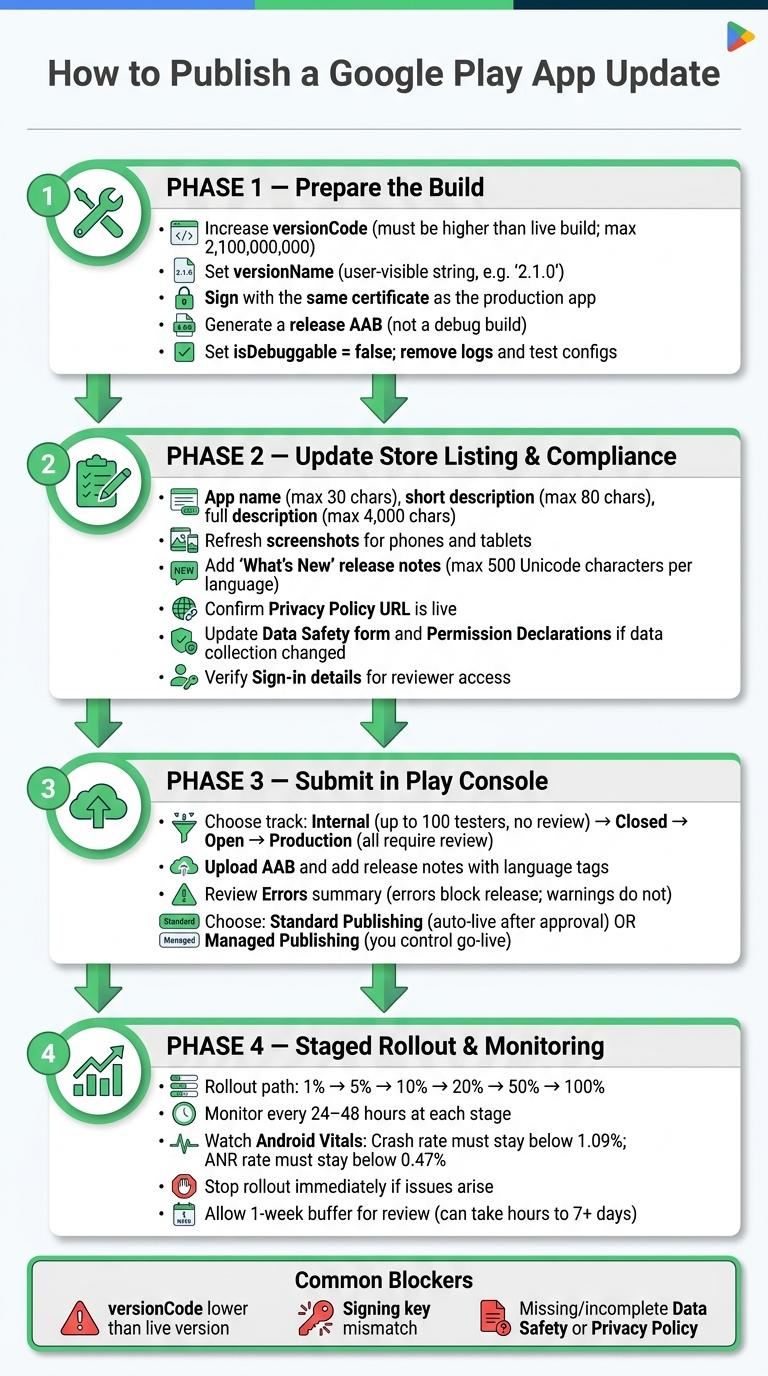
Publishing a Google Play update is simple in theory: bump the version, upload the .aab, pass review, and roll it out in stages. But one missed item, like a bad versionCode, wrong signing key, or outdated Data Safety form, can stop the release before it ships.
If I wanted the short version, I’d focus on these steps first:
- Build the update right
- Increase versionCode
- Check versionName
- Sign with the same certificate as the live app
- Generate a release AAB, not a debug build
- Check policy and store details
- Confirm target API level meets Google Play rules
- Review Data Safety, Privacy Policy URL, and permission forms
- Update screenshots, descriptions, and What’s new
- Submit the release in the right track
- Use Internal, Closed, Open, or Production
- Review errors before sending it to Google
- Use Managed Publishing if I want approval first and launch later
- Roll out with control
- Start small, such as 1%
- Watch crashes and ANRs in Android Vitals
- Move up step by step over 24–48 hours
- Stop the rollout if users hit issues
A few numbers matter here. Google Play review may take hours, but it can also take 7+ days. Release notes are capped at 500 characters per language. And the article points to Android Vitals thresholds of 1.09% crash rate and 0.47% ANR rate as numbers worth watching during rollout.
If I were planning a launch date, I’d give myself at least a one-week buffer and treat each update like a checklist-driven release, not a last-minute upload.
How to update app in Google Play Console | 2024 update
sbb-itb-622dc24
Prepare the Update Build Before Uploading
Getting the build right before you open Google Play Console saves time and helps you avoid review problems that are easy to prevent.
Check Google Play Requirements and Policy Readiness
Start with your target API level. Google Play sets a minimum target API level for app updates, and if your build is below that line, the release gets blocked. You should also check the package format. Google Play requires Android App Bundle (.aab) for new apps, and AAB is the standard format for app delivery.
Policy setup matters just as much as the build itself. Your Data Safety section needs to be filled out, your Privacy Policy URL needs to be live and correct, and if the app asks for sensitive permissions like SMS or Call Log access, you need a Permissions Declaration Form. One issue shows up more than any other: a missing or broken privacy policy is still the most common reason apps get rejected.
Set Version Code, Version Name, and Release Signing Correctly
Google Play uses two fields in your build.gradle file to identify an update: versionCode and versionName.
| Field | Format | Who Sees It | Requirement |
|---|---|---|---|
versionCode |
Positive integer | Google Play (internal) | Must be higher than the current published build and cannot exceed 2,100,000,000 |
versionName |
String (for example, "2.1.0") |
Users on the Play Store | No strict format required |
Here’s the part that trips people up: versionCode has to be higher than the current live release, and it must stay under 2,100,000,000. If it doesn’t, Play Console won’t accept the update.
Signing also has to match. Your new build must be signed with the same certificate as the version already in production. If the certificate is different, Google Play rejects the update.
If you use Play App Signing, Google keeps the app signing key, and you sign the AAB with an upload key before sending it in. Lost the upload key? Annoying, yes, but not fatal. The account owner can ask for a reset through the Play Console help form without affecting the app signing key or current users.
Build the Release Bundle and Run Final Tests
Before you generate the release build, do one last cleanup pass. Set isDebuggable = false in your Gradle build types, remove logging statements, and make sure every app URL points to the production server instead of staging or test systems. It’s also smart to delete unused test files and staging config before release.
After that, generate the signed AAB and verify the signing certificate with jarsigner -verify -verbose -certs my_application.aab. Then test the release build on at least one phone and one tablet. This helps you catch layout issues, scaling bugs, and problems in core flows like login and payments.
If the app connects to third-party services, register the app signing key fingerprint, either SHA-1 or SHA-256, with each service.
Once the build checks out, update the store listing and compliance fields before submission.
Update Store Listing and Compliance Information
With the build ready, make sure the store listing and compliance details match that same release. Even a valid build can get blocked in review if this info is out of date. In Play Console, open App content and check the Needs attention tab to spot missing policy declarations or expired deadlines early.
Update Listing Details
Review the app name (30-character limit), short description (80 characters), and full description (4,000 characters) to make sure they reflect any new features. If the UI changed, refresh your screenshots for phones and tablets, along with the feature graphic and app icon. Keep key visuals centered so they scale well across screen sizes.
Skip promotional wording. Remove rankings, awards, and other promo claims from the listing.
Also confirm that your support email, website URL, and app category are still correct. Then add your "What's new" release notes, with up to 500 Unicode characters per language. Keep those notes factual. This space is for what changed, not for promotion or calls to action.
Review Privacy Policy, Data Safety, and Permission Declarations
If the update changes data collection, data sharing, or app permissions, update the Data Safety form, Privacy Policy URL, and permission declarations before you submit.
| Compliance Element | Where in Play Console |
|---|---|
| Privacy Policy URL | App content > Privacy Policy |
| Data Safety Form | App content > Data safety |
| Sign-in Details | App content > Sign-in details |
If the release adds restricted areas, update Sign-in details with current test access. Reviewer access gets missed all the time, and that often slows down approval.
Once these fields line up with the update, you can move to the release creation step in Play Console.
Submit the Update in Google Play Console
Once your store listing and compliance details are set, it’s time to create the release in Play Console.
Choose the Right Track and Create a New Release
With your build and metadata ready, open the track you want to use. Google Play gives you four release tracks:
| Track | Audience | Review Required |
|---|---|---|
| Internal Testing | Up to 100 specific testers | No (usually) |
| Closed Testing | Limited testers via email lists | Yes |
| Open Testing | Any Google Play user who joins via the store listing | Yes |
| Production | All users in selected countries | Yes |
Pick the right one, then click Create new release in the top-right corner of Play Console.
Upload the AAB and Add Release Notes
Upload your Android App Bundle (AAB). Play Console will check the bundle and show the supported devices.
Next, add an internal release name. Then enter your release notes with language tags, one tag per line. For example: <en-US>Bug fixes and performance improvements</en-US>. Each language entry is limited to 500 Unicode characters.
After the upload finishes, look over the release details that Play Console generates before you send the build for approval.
Review Changes, Use Managed Publishing, and Send for Review
Before you submit, check the Errors summary on the preview screen. Errors will stop the release from being published. Warnings won’t block submission, but it’s still smart to clean them up.
Then choose how you want the update to go live. Standard publishing puts the release live on its own after Google approves it. Managed publishing, which you turn on in the Publishing overview, lets you hold the update until you click Publish changes yourself after approval.
Once the release is submitted, keep an eye on the rollout and fix any issues before you expand access.
Manage Rollout, Monitor Results, and Plan the Next Update
Use Staged Rollout and Watch Android Vitals
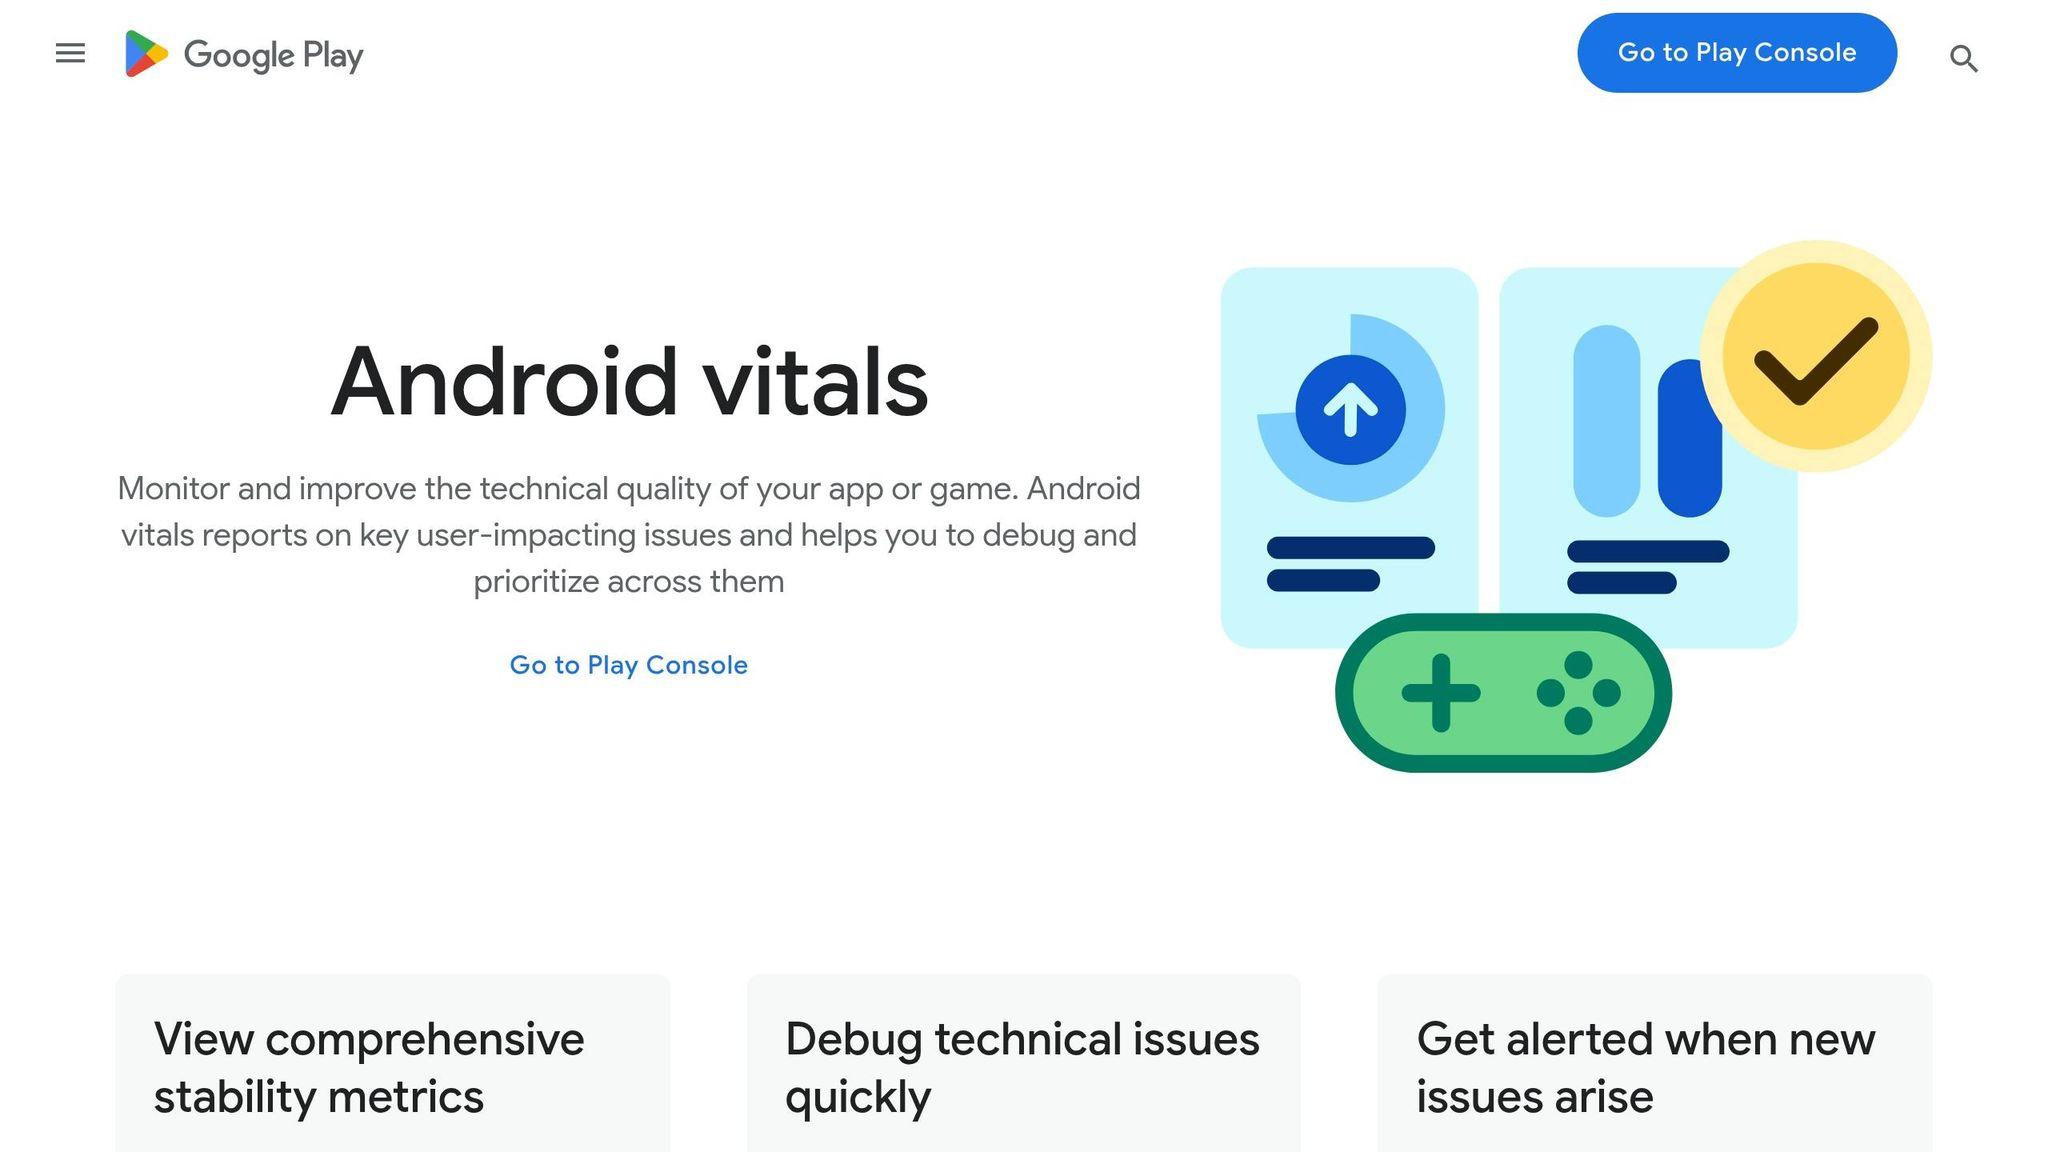
Once Google approves the release, use a staged rollout to control how many people get the update. Don’t push it to everyone at once. A common path is 1%, 5%, 10%, 20%, 50%, then 100%, with 24–48 hours of monitoring at each step. You increase the rollout manually in Manage rollout > Update rollout.
To set this up, open the Production page in Play Console, go to the Releases tab, click Edit on your release, scroll to Staged rollout, enter the percentage you want, and click Start rollout.
As the rollout moves forward, keep a close eye on Android Vitals. Your crash rate should stay below 1.09%, and your ANR rate should stay below 0.47%. Check installs, updates, ratings, and public reviews too. During a staged rollout, users can leave public feedback, and that often helps you spot problems before the update hits everyone.
If something looks off, stop the rollout immediately. Anyone who already got the update will remain on that version until you publish a new release. From there, review Android Vitals and user feedback before moving to the next percentage.
Fix Common Publishing Errors Quickly
Most publishing blocks come from the same few issues:
- A versionCode lower than the version already live
- A signing key mismatch
- Missing or incomplete Data Safety or Privacy Policy declarations
If Play Console shows an error, open the error details and fix the build or metadata issue at the source. Then rebuild if needed and submit the release again.
Build a Repeatable Update Workflow
Use the same release checklist every time. Increment versionCode for each new upload, and use versionName as the label users see. Before Production, test in Internal and Closed testing.
It also helps to keep your store metadata up to date with each release.
Conclusion: Key Steps to Publish Google Play Updates Without Issues
The safest Google Play updates tend to follow the same rhythm every time: prepare, verify, upload, review, then roll out.
Before you submit, bump versionCode, check signing, and update your store listing and compliance details.
It also helps to pick the right release track and use staged rollout with Managed Publishing so you can control when the update goes live and how it reaches users.
Give yourself at least a one-week buffer before your target release date in case review takes longer than expected.
Using the same release checklist each time cuts down on avoidable delays and makes the whole process more predictable.
FAQs
How long can Google Play review take?
Google Play review usually takes 1 to 3 days for most apps.
In some cases, it can take up to 7 days or longer, especially for first-time submissions or apps in sensitive categories.
What if your upload key is lost?
If your app uses Play App Signing, you can ask Play Console support to reset your upload key. First, create a new upload key and export its certificate in PEM format. Then the account owner needs to send the reset request.
That way, you can still publish app updates because the app signing key remains secure with Google.
If you’re not enrolled in Play App Signing, the situation is much tougher. You won’t be able to update the current app. Your only path is to publish a new app with a different package name.
When should I pause a staged rollout?
Pause a staged rollout if you spot an issue in your app that could affect users. This limits how many people get the problem version.
Once you pause the rollout, no new users will receive that version. Users who already have it will stay on it until you fix the issue and resume the rollout.
More from the studio