All blogs
Mobile App Development
Low-Fidelity vs High-Fidelity Prototypes: Key Differences
Understand the key differences between low-fidelity and high-fidelity prototypes in app development to enhance your design process and stakeholder engagement.
19 min read
Low-Fidelity vs High-Fidelity Prototypes: Key Differences
In app development, prototypes help visualize and test how an app will look and function before coding begins. The two main types - low-fidelity and high-fidelity prototypes - serve different purposes depending on the project's stage:
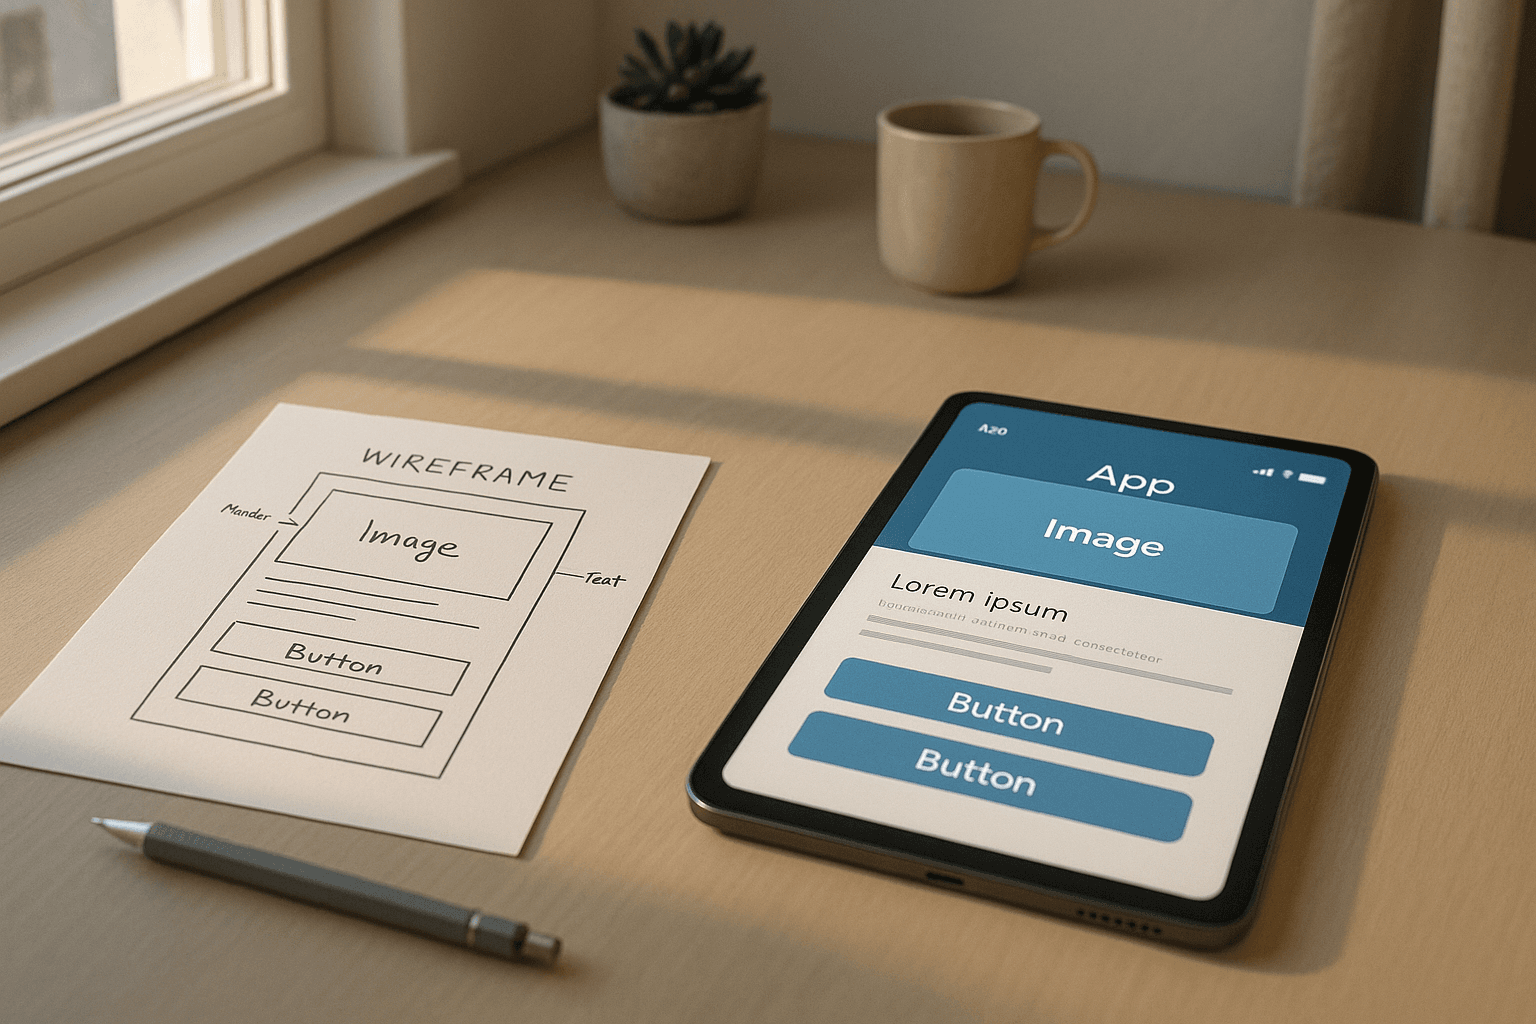
- Low-Fidelity Prototypes: Simple, quick to create, and inexpensive. Focus on layout and user flow using basic wireframes or sketches. Ideal for early-stage brainstorming and concept validation.
- High-Fidelity Prototypes: Detailed, interactive, and polished. Mimic the final product with design elements like colors, typography, and animations. Best for later stages, stakeholder presentations, and usability testing.
Quick Comparison
| Factor | Low-Fidelity Prototypes | High-Fidelity Prototypes |
|---|---|---|
| Development Time | 1-3 days | 1-3 weeks |
| Cost | $500-$2,000 | $5,000-$15,000 |
| Visual Detail | Basic shapes, placeholder text | Final design elements |
| Interaction Level | Basic navigation | Comprehensive interactions |
| Testing Focus | User flow, structure | Usability, visual design |
| Best Use Case | Early-stage validation | Detailed testing, stakeholder demos |
Choosing between the two depends on your project's goals, timeline, and budget. Start with low-fidelity for quick feedback, then transition to high-fidelity for refining details and presenting a polished vision.
UI/UX Prototyping: Choosing Between Low Fidelity, Mid Fidelity, or High Fidelity Prototypes
Low-Fidelity vs High-Fidelity Prototypes Explained
Now that we've covered the basics of prototypes, let's dive deeper into the two main types: low-fidelity and high-fidelity. Knowing when and how to use each one is key to making smart choices during app development. These prototypes serve different purposes depending on the stage of your project.
The primary difference lies in how much detail and functionality they include. Low-fidelity prototypes are all about the basics - focusing on structure and initial concepts. High-fidelity prototypes, on the other hand, are detailed and interactive, giving a near-finished feel. Think of it as the difference between a rough sketch and a fully painted masterpiece. This contrast helps designers pick the right tool for the job at each phase of development.
Low-Fidelity Prototypes: What They Are and When to Use Them
Low-fidelity prototypes are simple, stripped-down versions of your app. They focus on the layout, navigation, and core functionality without diving into design details. These prototypes often use basic shapes, placeholder text, and rough wireframes to represent screens and interactions.
The purpose of these early-stage models is to validate the core ideas and user flow. They answer critical questions like, "Does this structure make sense?" or "Can users navigate easily?" You can create them using sketches on paper, basic wireframing tools, or simple clickable mockups. The emphasis here isn’t on aesthetics - it’s on ensuring the fundamental structure works.
These prototypes shine during the early brainstorming and concept validation phases. They’re quick and inexpensive to produce, making them perfect for testing various ideas and iterating based on feedback.
Development teams also use low-fidelity prototypes to get everyone on the same page about the app’s basic functionality before jumping into detailed design work. Since they strip away visual distractions, they’re great for focusing on usability and flow.
High-Fidelity Prototypes: What They Are and When to Use Them
High-fidelity prototypes, on the other hand, are detailed and interactive models that mimic the final product as closely as possible. These prototypes include polished design elements like colors, typography, images, and animations. Users can interact with them - tapping buttons, scrolling through screens, and experiencing transitions - just as they would with the finished app.
These prototypes are powerful tools for testing the user experience and presenting your vision to stakeholders. They allow you to gather precise feedback on design details that low-fidelity prototypes can’t capture. For instance, you can test whether users understand your iconography, how they react to your color palette, or whether your animations enhance usability.
High-fidelity prototypes are most useful during the later stages of design and development. They’re invaluable for stakeholder presentations, especially when you need to impress investors or clients with a clear vision of the final product. They also help bridge the gap between design and development teams by offering a detailed blueprint of what needs to be built.
The interactive nature of these prototypes makes them ideal for in-depth user testing. You can fine-tune everything from button placement to animations based on real user feedback. Plus, they serve as a kind of "living documentation", keeping everyone aligned on the final product vision throughout the development process.
Main Differences Between Low-Fidelity and High-Fidelity Prototypes
Building on the earlier definitions of prototypes, let’s dive into a side-by-side comparison to help you choose the right approach. The differences between low-fidelity and high-fidelity prototypes directly influence factors like iteration speed, budget, and team collaboration. Understanding these distinctions ensures smoother workflows and better cost management.
Each type comes with trade-offs that impact timelines, expenses, and how your team approaches design problems. These differences determine how quickly you can refine ideas and validate your concepts. Below is a detailed comparison of the key factors.
Side-by-Side Comparison: Features and When to Use Each
Here’s how low- and high-fidelity prototypes stack up across critical factors:
| Factor | Low-Fidelity Prototypes | High-Fidelity Prototypes |
|---|---|---|
| Development Time | 1-3 days for basic app flows | 1-3 weeks for complete interactive models |
| Cost | $500-$2,000 for wireframes | $5,000-$15,000 for detailed prototypes |
| Visual Detail | Basic shapes, placeholder text, grayscale | Final design elements |
| Interaction Level | Basic navigation | Comprehensive interactions |
| Testing Focus | Information architecture, user flow | Visual design, usability, accessibility |
| Stakeholder Impact | Great for internal team alignment | Ideal for client presentations and investor demos |
Development time is one of the most noticeable differences. Low-fidelity prototypes are quick to create - often ready in just a day or two - making them perfect for rapid iterations. High-fidelity prototypes, on the other hand, require more time and effort but deliver a polished, near-final experience that’s crucial for end-stage validation.
The cost difference reflects the complexity involved. Low-fidelity prototypes are relatively inexpensive and can often be created by junior designers or even team members without a design background. In contrast, high-fidelity prototypes typically require skilled UI/UX designers who are proficient with advanced tools and techniques.
Visual detail plays a huge role in how your prototype is perceived. Low-fidelity prototypes keep things simple, using grayscale layouts and placeholder text to focus discussions on functionality. High-fidelity prototypes, however, include the final design elements, showcasing how the user interface will look and feel.
The interaction level determines the type of feedback you'll gather. Low-fidelity prototypes are great for testing basic navigation and user flow, while high-fidelity versions allow for testing more complex interactions, like gestures, animations, and error handling.
Testing focus also shifts depending on the prototype type. Low-fidelity prototypes are ideal for catching structural issues, such as confusing navigation or missing features, early in the process. High-fidelity prototypes, meanwhile, are better for identifying finer details, like button placement, color contrast, or animation timing, which can significantly impact user satisfaction.
Stakeholder impact depends on your audience. Development teams often find low-fidelity prototypes sufficient because they can envision the final product. However, external stakeholders - like clients or investors - usually need high-fidelity prototypes to clearly see the polished vision and understand the full potential of the project.
These comparisons can help you decide when to use each type. Low-fidelity prototypes are ideal for early stages when you’re brainstorming ideas, validating core functionality, or working under tight deadlines. High-fidelity prototypes are better suited for later stages, where design details need to be finalized, user testing requires depth, or you’re presenting to stakeholders who need to see the finished vision.
When to Choose Low-Fidelity vs High-Fidelity Prototypes
Picking the right type of prototype for your project depends on its stage, budget, and goals. Making the right choice can save you time and money while improving your final product. Early-stage projects often benefit from simpler approaches, while later stages may call for more detailed prototypes. The experience level of your team also factors into this decision.
Best Times to Use Low-Fidelity Prototypes
Low-fidelity prototypes shine during the early brainstorming phases when you're juggling multiple ideas. They’re perfect for testing various navigation options or exploring concepts without investing too much time in design.
If you're working with limited funds or tight deadlines, low-fidelity prototypes are a smart choice. They allow you to validate core functionality and concepts without committing to expensive design work. Startups, for instance, often use these prototypes to test market fit before seeking additional funding.
These prototypes also serve as a shared reference point for teams. When developers, product managers, and stakeholders need to align on basic functionality, low-fidelity prototypes keep the focus on the user flow rather than design details like colors or typography.
They’re especially useful for testing key assumptions about your app's structure. For example, if you're unsure whether users will understand your navigation or if a feature should be front and center, simple mockups can help you gather feedback and make adjustments.
Low-fidelity prototypes are also ideal for rapid iteration. When frequent changes are expected based on user feedback or stakeholder input, the ability to tweak wireframes quickly helps maintain momentum.
On the other hand, when your project demands detailed visuals or realistic user interactions, high-fidelity prototypes become the better option.
Best Times to Use High-Fidelity Prototypes
High-fidelity prototypes are crucial when you're presenting to external stakeholders. Investors, clients, or executives often struggle to visualize the final product from basic wireframes, so detailed prototypes can help secure buy-in or funding.
They’re also essential for accurate user experience testing. When you need to see how users interact with specific design elements, respond to visual cues, or navigate complex workflows, the realistic nature of high-fidelity prototypes provides the insights you need.
Use high-fidelity prototypes to finalize design details before moving into development. Once the core concept and user flow are validated, these detailed prototypes help you test elements like button placement, color schemes, and animations - factors that directly affect user satisfaction.
For developer handoff, high-fidelity prototypes are invaluable. They provide clear specifications, reducing miscommunication and making the coding process smoother and faster.
High-fidelity prototypes are also necessary for accessibility testing. Evaluating screen reader compatibility, color contrast ratios, and touch target sizes requires realistic interface elements and interactions.
Moving from Low-Fidelity to High-Fidelity Prototypes
Once you've validated basic concepts, it’s time to shift to high-fidelity prototypes to refine the details. A step-by-step approach works best: start with low-fidelity to confirm functionality, then gradually add visual polish.
Begin by mapping out essential user journeys with low-fidelity prototypes. Once these are validated, enhance critical screens with more detail. This ensures that you’re focusing on functionality first, without getting bogged down by appearance too early.
Milestone-based transitions are often effective. For example, move to high-fidelity prototypes after achieving key goals, such as stakeholder approval of the core concept, positive user feedback on functionality, or confirmation of technical feasibility.
Your development timeline also plays a role. In agile workflows, you might create high-fidelity prototypes for features scheduled for upcoming sprints, while keeping future features in low-fidelity until they’re prioritized.
Finally, consider your resources. As your project gains funding or team capacity, you can invest more in detailed design work. This ensures you’re not overcommitting resources to design before validating your core ideas.
Flexibility is key throughout this process. Some features may require high-fidelity prototypes early due to complexity or stakeholder expectations, while others can remain low-fidelity until later in development. Tailor your approach to your project’s unique needs and constraints rather than sticking to a rigid timeline.
sbb-itb-622dc24
Pros and Cons of Each Prototype Type
When comparing prototypes, understanding the strengths and limitations of each approach is essential. The right choice depends on your project's needs, timeline, and budget. Here's a closer look at the pros and cons of both low-fidelity and high-fidelity prototypes.
Low-Fidelity Prototypes: Advantages and Drawbacks
Low-fidelity prototypes are quick and easy to create. A simple sketch or a basic wireframe can be ready in minutes, and digital versions can be made within hours. This speed allows teams to experiment with various ideas without committing too much time or resources.
These prototypes are also cost-effective. Tools like pen and paper or basic wireframing software are inexpensive compared to complex design tools, making them an accessible option for teams on a tight budget.
Another advantage is their flexibility. Changes and updates can be made almost instantly, making them ideal for agile workflows where requirements often shift. Plus, because these prototypes are so simple, teams can focus on functionality and user flow without getting bogged down by visual details like colors or fonts.
That said, low-fidelity prototypes have their limitations. One major drawback is their limited usability for user testing. Users often struggle to provide meaningful feedback on wireframes because they lack the realism needed to visualize the final product.
Additionally, communicating the vision to stakeholders can be tricky. Investors, executives, or clients may find it hard to grasp the full potential of the project through simple sketches, leading to misaligned expectations or difficulty securing buy-in.
Finally, the lack of technical constraints in low-fidelity prototypes can lead to issues later. Designs that seem logical on paper may prove technically challenging - or even impossible - to implement within the project's budget or timeline.
High-Fidelity Prototypes: Advantages and Drawbacks
High-fidelity prototypes, on the other hand, offer a much more realistic experience. Users can interact with interfaces that closely mimic the final product, providing detailed feedback on usability, design, and functionality.
These prototypes also make it easier to communicate with stakeholders. A polished, interactive prototype helps investors, clients, and team members clearly understand the product vision and provide targeted feedback.
For developers, high-fidelity prototypes streamline the handoff process. Detailed specifications, including measurements, color codes, and interaction behaviors, reduce misunderstandings and make coding more efficient.
They also allow for thorough accessibility testing. You can check color contrast, screen reader compatibility, and touch target sizes to ensure the product meets accessibility standards before moving into development.
High-fidelity prototypes are especially useful for marketing and presentations. Whether you're pitching at a conference, creating promotional materials, or showcasing to potential customers, a realistic prototype leaves a stronger impression than a basic wireframe.
However, these benefits come at a cost. High-fidelity prototypes require more time, money, and expertise. Skilled designers, advanced tools, and multiple iterations can strain resources, particularly for early-stage projects.
Another downside is the risk of premature optimization. Teams may focus too much on perfecting visual details before validating core functionality, which can lead to wasted effort if major changes are needed later.
Lastly, high-fidelity prototypes are less flexible when it comes to significant changes. Updating a detailed design can take much longer than tweaking a simple wireframe, which can slow progress and create resistance to necessary adjustments.
Finding the Right Balance
The choice between low-fidelity and high-fidelity prototypes depends on your project's stage, goals, and available resources. Many teams find success by combining both approaches - starting with low-fidelity prototypes to validate ideas and transitioning to high-fidelity versions for detailed testing and stakeholder alignment.
How Agile App Development Teams Can Use Both Prototype Types
Agile development thrives on adaptability, making it the perfect environment for using both low- and high-fidelity prototypes. The trick lies in understanding when to use each type to boost your team's productivity and create better products.
Matching Prototype Type to Development Stage
The transition from low-fidelity to high-fidelity prototypes fits naturally into the different stages of agile development. Early sprints are ideal for low-fidelity prototypes, which help validate core ideas, user flows, and stakeholder needs quickly. These simple models allow teams to gather feedback fast without overcommitting resources. Once the initial concepts are validated, the focus can shift to high-fidelity prototypes. These more detailed models include interactive features and refined designs, making them crucial for usability testing or securing stakeholder approval during later sprints.
This iterative approach ensures that early ideas evolve into a polished, user-friendly product. Each cycle brings new insights, helping teams refine their concepts, discard ineffective ideas, and focus on what aligns with business goals. By following this phased strategy, teams can better manage budget, time, and resources throughout the project.
Considering Budget, Time, and Team Requirements
When working under budget constraints, low-fidelity prototypes are the go-to option. They’re cost-effective and quick to create, allowing teams to explore multiple ideas without significant investment.
Time-sensitive sprints also benefit from low-fidelity prototypes. A basic wireframe can be prepared in a matter of hours, while high-fidelity versions often take days or even weeks. That said, high-fidelity prototypes are worth the extra effort when it comes to stakeholder presentations or detailed user testing.
The skill set of your team plays a big role in choosing the right prototype. Teams with experienced designers and access to advanced tools can easily develop high-fidelity prototypes. On the other hand, teams with limited resources might rely on simple tools like pen and paper or basic wireframing software. It’s also important to consider the audience. While polished high-fidelity prototypes might impress investors or executives, internal team discussions often work just fine with rough sketches or basic wireframes. These factors should be integrated into sprint planning for a more efficient workflow.
Adding Prototyping to Agile Work Processes
To integrate prototyping into your agile workflow, treat it like any other user story during sprint planning. Assign clear goals to each prototype - whether it’s validating a user flow, testing a feature’s usability, or showcasing an idea to stakeholders. Use tools like story mapping and user stories to guide the initial prototyping phase and ensure you’re addressing user needs effectively.
Agile’s iterative nature makes it easier to break down prototyping into smaller, manageable steps. This allows for continuous feedback and quick adjustments as needed. Be prepared to revise, reset, or pivot designs based on what you learn. By staying flexible and open to feedback, teams avoid becoming too attached to early concepts and can focus on creating a product that truly meets user needs.
Regular prototype reviews should be a standard part of your sprint cycles. These reviews act as critical checkpoints to evaluate progress and gather feedback. The best agile teams embrace this flexibility, using feedback to refine designs, tweak features, and improve functionality. This commitment to iteration ensures that the final product is not only functional but also user-centered.
At Appeneure, incorporating both low- and high-fidelity prototypes into our agile processes is a cornerstone of our approach. It allows us to refine designs continuously and deliver mobile applications that truly resonate with users.
Tools and Methods for Creating Prototypes
The tools you choose can make or break your prototyping process. From sketching rough ideas to building polished, interactive mockups, having the right resources ensures your team moves efficiently through each design stage. Let’s dive into some of the best tools for both low- and high-fidelity prototypes, along with tips for agile teams.
Tools for Creating Low-Fidelity Prototypes
When speed and simplicity matter most, low-fidelity tools are your go-to. They help teams capture ideas quickly without getting bogged down in details.
- Pen and paper: Sometimes, the simplest tools are the most effective. Sketching wireframes by hand is a quick way to brainstorm ideas or share concepts during client meetings. In fact, many successful apps started as quick sketches on napkins.
- POP (Prototyping on Paper): This tool transforms your hand-drawn wireframes into clickable prototypes in just hours. It’s perfect for validating early-stage concepts without heavy investments in time or resources.
- Balsamiq Mockups: With its intentionally rough design style, Balsamiq keeps the focus on functionality rather than aesthetics. Its drag-and-drop interface makes it easy for non-designers, such as developers or product managers, to communicate ideas visually.
- Marvel's POP feature and InVision Freehand: These tools are ideal for remote teams, offering collaborative whiteboarding experiences. Team members can contribute to wireframes in real time, speeding up the ideation process.
- Whimsical and Draw.io: Whimsical shines for creating user flow diagrams, while Draw.io is great for basic wireframes. Both tools are user-friendly and work well for teams without extensive design expertise.
Tools for Creating High-Fidelity Prototypes
High-fidelity prototypes are essential in agile development, where detailed and interactive designs are needed to validate ideas and test functionality.
- Figma: A favorite among design teams, Figma offers real-time collaboration, component libraries, and advanced animation features. Its browser-based platform allows teams to access prototypes from anywhere, no software installation required.
- Adobe XD: Known for its robust prototyping features, Adobe XD supports voice commands, auto-animate transitions, and seamless integration with other Adobe Creative Suite tools. Teams already using Adobe products often find it an easy addition to their workflow.
- Sketch: This Mac-only design tool pairs well with platforms like InVision or Principle to create high-fidelity prototypes with micro-interactions and complex animations. While limited to Mac users, Sketch’s extensive plugin ecosystem makes it highly customizable for advanced projects.
- Framer: Perfect for code-based prototyping, Framer enables teams to create prototypes with real data, advanced interactions, and production-ready components. It’s an excellent choice for projects requiring integration with APIs or showcasing complex functionality.
- ProtoPie: If your app relies on device features like accelerometers, cameras, or location services, ProtoPie is the tool for you. It specializes in sensor-based prototyping, making it easier to demonstrate these interactions before development begins.
Picking the Right Tools for Agile Teams
Choosing the right tools depends on your team’s needs and the stage of your project. Here are some factors to consider:
- Budget: For teams watching costs, free options like Figma’s starter plan or open-source tools can be a great starting point. Premium features can be added later as needed.
- Team size and collaboration: Smaller teams may find simpler tools sufficient, while larger organizations often benefit from enterprise-level features like advanced permissions, version control, and integrations.
- Skill levels: Teams with advanced design expertise might lean toward tools like Framer or Principle for more sophisticated prototypes. Mixed-skill teams, however, often prefer intuitive options like Marvel or Balsamiq.
- Handoff needs: If your prototypes need to generate CSS code or detailed design specs for developers, tools like Figma or Adobe XD excel at bridging the gap between design and development.
Many agile teams take a hybrid approach. For example, they might sketch initial ideas in Balsamiq, refine designs in Figma, and create polished, interactive prototypes in Framer. This method allows teams to leverage the strengths of different tools at each stage of the design process.
Lastly, consider how your tools integrate with project management platforms like Jira, Slack, or Trello. Many modern prototyping tools offer plugins or native integrations, helping to streamline workflows and keep design work aligned with project timelines.
At Appeneure, we’ve found that a flexible approach to tool selection enables us to adapt quickly to diverse project needs while maintaining a consistent design and development process.
Conclusion: Picking the Right Prototype for Your Project
Choosing the right type of prototype is all about aligning your approach with the specific needs of your project. This decision directly influences your timeline, budget, and overall success.
To make the best choice, consider these key questions: What stage is your project in? What kind of feedback are you looking for? What resources - both time and money - do you have available? Your answers will point you toward the most effective prototyping method.
In the early stages, when you're still shaping core ideas and testing user flows, low-fidelity prototypes are your best bet. They allow you to explore concepts quickly and inexpensively, without getting bogged down by details like design elements or animations. As your project evolves and you need to refine interactions or gather more detailed feedback, high-fidelity prototypes become essential. These more polished models help you assess how closely your design aligns with the final product. Essentially, fidelity should increase as your project progresses and your understanding of user needs deepens.
Of course, budget and timeline constraints are critical factors. If you're working under tight deadlines or with limited funds, starting with low-fidelity prototypes can help you move forward without overextending yourself.
The most effective development teams know how to balance both types of prototypes. They start with rough, low-fidelity models to validate key ideas and gradually increase fidelity as they move closer to development. This method reduces risks and ensures you're focusing your efforts where they matter most. It’s an approach we’ve seen work time and again at Appeneure.
At Appeneure, we've observed firsthand how a well-thought-out prototyping strategy can determine a project's success. Whether you're creating a simple app or a complex platform powered by AI, aligning your prototype's fidelity with your goals ensures you're making the smartest use of your resources.
FAQs
When should I move from a low-fidelity to a high-fidelity prototype in app development?
Once your app's basic structure and user flows have been validated, it's time to transition from a low-fidelity to a high-fidelity prototype. This usually happens after initial feedback confirms that the core ideas align with user needs, signaling that the team is ready to refine the visual design and interactive elements.
High-fidelity prototypes are particularly useful when testing detailed interactions, collecting usability feedback, or showcasing a design that closely mirrors the final product. Timing this shift depends on factors like project deadlines, the complexity of the app, and available resources. By making this move at the right moment, you can avoid expensive revisions and create a smoother path toward development.
What are the best tools for creating low-fidelity and high-fidelity prototypes, and how do they differ?
For low-fidelity prototypes, tools such as pen and paper, PowerPoint, Keynote, Penpot, and Excalidraw are fantastic options. They’re quick to use, budget-friendly, and great for brainstorming or experimenting with early design ideas.
On the other hand, high-fidelity prototypes are better suited for tools like Figma, UXPin, and Visily. These platforms allow for detailed, interactive, and visually refined designs, making them ideal for user testing and presenting concepts to stakeholders.
The main distinction between the two is their purpose: low-fidelity tools prioritize speed and adaptability, while high-fidelity tools focus on creating realistic, interactive mockups for later stages of app development.
What are the advantages of using both low-fidelity and high-fidelity prototypes in agile app development?
Using both low-fidelity and high-fidelity prototypes can play a crucial role in making the agile app development process more efficient. Low-fidelity prototypes are great for sketching out initial ideas, outlining user flows, and collecting feedback early on. Since they don’t require much time or resources to create, they’re perfect for fast iterations and quick adjustments during the early design stages.
On the flip side, high-fidelity prototypes provide a detailed and realistic look at the app, closely resembling the final product. These are essential for testing usability, refining the visual design, and ensuring interactive elements align with user expectations. By leveraging both types of prototypes, teams can reduce the risk of expensive revisions, stay aligned with user needs, and deliver a well-designed app more effectively.
More from the studio